Convert multiple Flash (flv) Videos to, for example, MPEG encoding

With ffmpeg and bash this is really easy. Also .flv and .mpeg are easily interchangeable by all other video codecs supported by ffmpeg:

#!/bin/bash
##convert all videos of $srctype type to $desttype type encoding
SRCCODEC="flv"
DESTCODEC="mpeg"
for i in *.$SRCCODEC; do
    echo
    echo -n "###################  "
    echo -n "will convert \"$i\""
    echo "  ###################"
    echo
    ffmpeg -i "${i}" -y "${i%%.${SRCCODEC}}.${DESTCODEC}" && rm -vf "$i"
done

Note that this includes removing the original video file only after a successful recode run overwriting existing destination files (-y option). The interesting part is this: ${i%%.${SRCCODEC}}. It removes the source’s postfix, i.e. file extension. You could save this as a text file, say convert_all_videos_in_pwd.sh and chmod +x filename. I have my own scripts go to ~/bin which I include in $PATH via ~/.bashrc. If you do so you would typically call this within the videos’ directory including logging all output and errors to convert.log, i.e. redirecting STDOUT (= file descriptor 1) and STDERR (= file descriptor 2) via &>:

convert_all_videos_in_pwd.sh &> convert_all.log &

If you want to see the output you could use tail -f logfile or read more on redirection and duplication. You could also do all that in a single command line:

for i in *.flv; do echo converting $i; ffmpeg -i "${i}" -y "${i%%.flv}.mpeg" && rm -vf "$i"; done

Convert Videos, Extract Audio from Videos and The Like

Just a short note on this right now:

Audio can be extracted with mplayer using -dumpaudio option (low quality), ffmpeg tool with -ab and -ar options or online for youtube videos at vixy.net.

Quick video converter flv2mpg using ffmpeg is shown at Linux by Example, too.

Update: Another great open source program is MediaCoder which even has a special audio edition.

Ressources

The Ultimate Lossless Compression Format with Hybrid Mode and Open Source: WavPack

Way the hack didn’t I trip over WavPack (wv) earlier — it’s been around for some time now and astonishingly ultimate. To make it short and obvious (see hydrogenaudio.org for complete list):

Pros

  • Open sourc
  • Good efficiency (fwd is even better than mp3’s on foobar2000)
  • Hybrid/lossy mode (see below)
  • Tagging support (ID3v1, APEv2 tags)
  • Replay Gain compatible (which is no deal with fb2k anyway, but still)

Cons

  • Limited hardware player support
  • does take long to encode with optimal settings (not really because one time procedure)

Other features

  • Supports embedded CUE sheets
  • Includes MD5 hashes for quick integrity checking
  • Can encode in both symmetrical and assymmetrical modes
  • Supports multichannel audio and high resolutions
  • Fits the Matroska container
  • streaming support
  • Error robustness

So it’s open source! Most distros even come along with WavPack preinstalled. The only other lossless formats that I know are open sourced are two: FLAC which has bad tagging support and Shorten (to put it short: out dated). MAC (Monkey Audio Codec, ape) has an open sourced version but it’s not developed any longer.

The next great feature is hybrid mode which means you decode to lossy small file and an additional file containing “the rest” of the information. Only one other format is capable of this: OptimFROG (ofr) in DualMode. That means, putting both files together you get your 100% original back. The lossy file can be used entirely on it’s own. While encoding there is a second file, called correction file, that stores the difference between lossy and original — compressed that is. So what that means is you don’t have to convert your files each time you’re to shove them onto your portable. The only bad thing is you need to ensure the device can decode (read: play) them.

WavPack Properties after encode
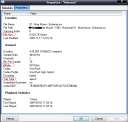
To give an example: If you convert a 27.5 MB ofr file to wv, hybrid enabled with lossy bitrate set to 192, you’ll get one 6.31 MB sized .wv file and a second 22.8 MB sized .wvc file. It took 12 min. 15 sec (playtime 4:25). Insane settings where: Compression Mode “high”, Processing Mode “6” (best encoding quality), Hybrid Lossy Mode “192kbps”. When you open the .wv file only in fb2k it’ll handle correction files automatically (see picture). However moving the file with foobar2000’s dialog “” will only move .wv files. I cannot speak for other software players but this way it’s just easy to handle two qualities of one file — one hifi one and on “to go”! After I now have converted an entire album here are the approximate file sizes comparing MAC, OptimFROG and WavPack and MP3/OggVorbis as lossy counterpart to “portable wv” (to be added to .ape/.ofr):

.ape 311 MB
.ofr 306 MB
.wv 70 MB
.wvc 255 MB
.wv+.wvc 325 MB
.mp3 (V2, ~190kbps) 74 MB
.ogg (q5, ~160kbps) 61 MB

Tagging: Unlike FLAC it uses APEv2 (or ID3v1) so tags can be used with most players, software and portable devices’ ones, without intervention.

While I ran encoding test’s with foobar2000 (which has decoding WavPack “build-in” by the way) I noticed when converting from, say, OptimFROG to WavPack fb2k went right at it. No temporary wav files as with OptimFROG to MAC, for example! But mind you it does take a long time if you use optimization for file size and quality. It seams to be somewhere around 0.7x (slightly slower than plain play time). I don’t see why this really is an issue because in most cases you’ll only encode once as it’s true for all lossless formats anyway.

Resources:

How to convert pixel (raster) files (png) to vector graphic (svg) on Linux

In another post I wrote about the small tool convert as part of imagemagick. With convert it is possible to, surprisingly enough, convert picture files. ASAIK it would not convert to or from vector graphics, though.

From the man-pages of inkscape:

Inkscape can import (File > Import) most bitmap formats (PNG, BMP, JPG, XPM, GIF etc.), plain text (requires Perl), and AI format (Adobe Illustrator documents, versions up to 7 only;
requires Perl).

Unfortunatelly it only works via the GUI. You need to either open, import or drag’n’drop the png file, mark it and go to the menu “Path” and than trace it via “Trace Bitmap…”. You might also want to set the output dimensions vie the File menu and “Document Properties” to 48×48 or similar if you are working on an icon. In my tests though, the output was rather crappy. Fortunately I found the original postscript of the program icon (foobar2000 it was).

If you need the other way around, i.e. vector  -> raster, there is a comand line argument to be used like this:

inkscape filename.svg --export-png=filename.png

See more details at examples in man pages of inkscape.

Update: And there is also Potrace and Delineate.

Resources:

Resizing Digital Pictures Made Easy

One might think it’s not that much of a task to resize a bunch of files in one directory so a certain dimention. Say you want to have all jpg images in your directory have width 1024 with aspect ratio maintained. For one image using GIMP actually this is easy. Just open it, go to image > scale image and type “1024” for width. That’s it. Knowing of GIMP’s batch mode feature I though: Well, now let’s just do this very same thing in batch mode for multiple files. Googling I found this passage Adrian Likins GIMP Batch How-To:

Batch mode is slow. Its not really a practical replacement for tools like ImageMagick or NetPBM when it comes to large scale image conversions or similar. At least not without writing some very clever scripts.
The problem with this approach is that gimp/script-fu has no built in procedures to iiterate though a list of images. So you cant easily tell gimp to load up *.jpg and run predator.scm on them, at least not without it taking a _long_ time.

There’s the solution, I thought. So I installed ImageMagick for Windows and made myself ready to run a Windows batch for loop on the files. After double checking against ImageMagick’s delivered help for convert I knew the syntax:

convert  -resize 1024

So far so good. But now comes the Windows batch bit. Even though fairly powerfull even compared with bash or other mighty script languages on Linux I couldn’t figure out how to run more than one command per iteration step. This is what I came around to, which does what intended, but without a pretty notice to the user that could have been done with adding something like ; @echo %i

for /f %i in ('dir /b *.jpg') do convert %i -resize 50% %i

Note that I chose to halve the pics rather than to hard-set the width so I don’t risk upright pictures to become bigger in file size than the original. There you go!

Update: I finally came around to do it with Linux. Here is the Bash equivalent to the above (plus an additional nice notification which is easy with Bash):

for i in *.jpg; do echo "converting \"$i\"..."; convert "$i" -resize 50% "$i"; done